This is the second part in a series on modernizing your JavaScript incrementally, using Vue.js. Part one discusses why we might need to do this.
Shall we review?
- Pretend you have an old project that’s built with jQuery
- Your client’s needs have changed, and now they need advanced functionality that would be difficult to build with vanilla JavaScript and jQuery
- You decide to build the new functionality with Vue.js, ’cause it seems good
Our project will end up with some fancy functionality for surprisingly little trouble. But we’re not there yet! Let’s write some code.
Step 0
All the code for this tutorial series is on Github1. For this post, we’re starting with the code at step 0.
I put together a sample site that uses Bootstrap (since it’s common) and jQuery (since Bootstrap requires it), but the existing architecture doesn’t matter much—point is, imagine this is one of your old projects, and you need to make it do fun stuff.
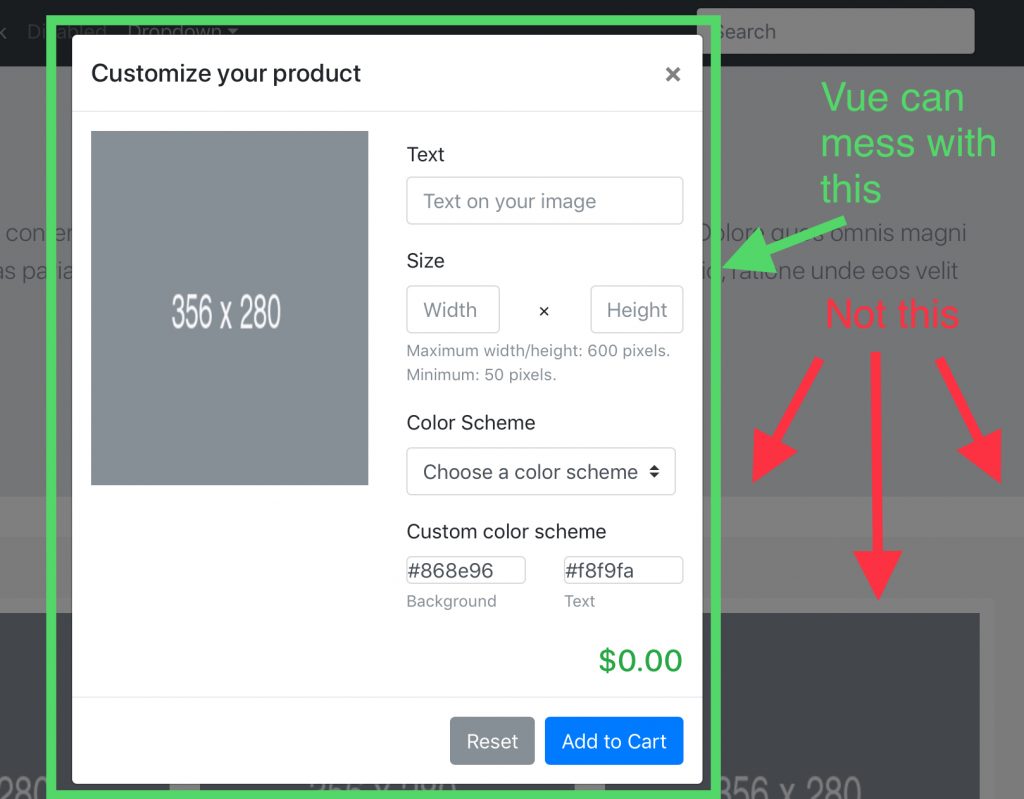
Behold, our starting point (source). We’ve already got our form’s HTML and CSS built; now we gotta make it interactive.
The JS in the demo project is basically empty, but yours might have a lot of existing jQuery 🍝. That’s okay! Since we’re just writing plain JavaScript here, you can tack your Vue functionality onto existing functionality however you’d like. Even if it means adding on to a 1500-line monster. We’re gonna get through this.
The HTML of the modal configurator thingy looks like this:
<section class="modal fade" id="modalWidget" tabindex="-1" role="dialog" aria-labelledby="modalWidgetLabel" aria-hidden="true">
    <div class="modal-dialog" role="document">
        <div class="modal-content">
            <div class="modal-header">
                <h5 class="modal-title" id="modalWidgetLabel">Customize your product</h5>
                <button type="button" class="close" data-dismiss="modal" aria-label="Close">
                    <span aria-hidden="true">×</span>
                </button>
            </div>

            <div class="modal-body">
                <form>
                    <div class="row">
                        <div class="col-sm-6">
                            <img alt="100%x280" src="https://placehold.it/356x280/868e96/f8f9fa" style="height: 280px; width: 100%; display: block;">
                        </div>

                        <div class="col-sm-6">
                            <div class="form-group">
                                <div class="row">
                                    <div class="col-12">
                                        <label class="col-form-label" for="productText">Text</label>
                                        <input type="text" class="form-control" id="productText" placeholder="Text on your image">
                                    </div>
                                </div>
                            </div>

                            <div class="form-group">
                                <label for="productSizeX">Size</label>

                                <div class="row align-items-center">
                                    <div class="col-5">
                                        <label class="sr-only" for="productSizeX">Width</label>
                                        <input class="form-control" type="text" id="productSizeX" placeholder="Width" aria-describedby="dimensionsHelp">
                                    </div>

                                    <div class="col-2">×</div>

                                    <div class="col-5">
                                        <label class="sr-only" for="productSizeY">Height</label>
                                        <input class="form-control" type="text" id="productSizeY" placeholder="Height" aria-describedby="dimensionsHelp">
                                    </div>
                                </div>

                                <small id="dimensionsHelp" class="form-text text-muted">
                                    Maximum width/height: 600 pixels. Minimum: 50 pixels.
                                </small>
                            </div>

                            <div class="form-group">
                                <label for="productColorScheme">Color Scheme</label>

                                <div class="row">
                                    <div class="col-12">
                                        <select class="custom-select" id="productColorScheme">
                                            <option selected>Choose a color scheme</option>
                                            <option value="Flowers">Flowers</option>
                                            <option value="Rivers">Rivers</option>
                                            <option value="Sand">Sand</option>
                                            <option value="Snow">Snow</option>
                                            <option value="Storm">Storm</option>
                                            <option value="Custom">Custom…</option>
                                        </select>
                                    </div>
                                </div>
                            </div>

                            <div class="form-group">
                                <label for="productCustomColorScheme">Custom color scheme</label>

                                <div class="row">
                                    <div class="col-6">
                                        <input id="productCustomColorScheme" type="color" name="productBGColor" value="#868e96" class="form-control p-0">
                                        <label class="form-text text-muted mt-0" for="productCustomColorScheme"><small>Background</small></label>
                                    </div>

                                    <div class="col-6">
                                        <input id="productTextColor" type="color" name="productTextColor" value="#f8f9fa" class="form-control p-0">
                                        <label class="form-text text-muted mt-0" for="productTextColor"><small>Text</small></label>
                                    </div>
                                </div>
                            </div>

                            <h4 class="mb-0 text-right text-success">$0.00</h4>
                        </div>
                    </div>
                </form>
            </div>

            <div class="modal-footer">
                <button type="button" class="btn btn-secondary" data-dismiss="modal">Reset</button>
                <button type="button" class="btn btn-primary">Add to Cart</button>
            </div>
        </div>
    </div>
</section>
If you’re following along, the developer tools for Chrome are worth an install.
Step 1
1.1 Add Vue to the project
Using Vue, do you need to change your build process? Do you need to learn Webpack? Transpiling? Babel? ES2015? Web components?
Nope.
One cool thing about Vue: there’s no need for transpilation, or other build processes, unlike some frameworks. In fact, you can write interfaces in Vue with plain old JavaScript, HTML, and CSS; no need to worry about fancy ES2015 features, unless you really want to.
Getting started is as simple as:
<!-- Include Vue before your own code -->
<script type="text/javascript" src="https://cdnjs.cloudflare.com/ajax/libs/vue/2.4.4/vue.js"></script>
Yep. That’s it. The whole library can just be dropped in via a script tag. Note: You’ll want to include the minified version of the library when you’re ready to go to production.
Is that ideal? No. Should you learn Webpack or Browserify or any of the other asset compilers? Probably, yeah. They’re amazing tools. They’ll make your life easier, in the long run, and they help you write more user-friendly code with neat features like bundle splitting.
But do you need to complicate your workflow with additional tooling, costing you precious days on your project, if you’re dealing with an old site?
Nah.
So just drop that script in there. As long as you include the Vue library before you write any Vue code, it’ll be fine. We can optimize later.
1.2 Initialize Vue
Now we have access to the Vue constructor. In your main JavaScript file, call it like so:
var Configurator = new Vue({
el: '#modalWidget',
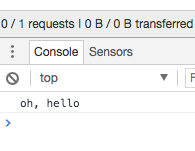
created: function () {
console.log('oh, hello');
}
});
That’s it: we just created a fresh instance of Vue, and now we can access the entire Vue API inside our Configurator variable.
The constructor takes an object as its only argument. The el property tells Vue we want the Vue instance attached to whatever element has the #modalWidget ID.
Just to make sure it’s working, we also gave it a property called created, which is a “lifecycle hook” available in every Vue instance. There are several lifecycle hooks available to us here, but we’re not worried about any of that for now; we just want to make sure nothing broke.
Check the console for yourself (source); this baby’s working.
Couple things to note here:
- This Vue instance is isolated from the rest of the world. Vue is only aware of the contents of the element specified in the
elproperty.
- If you need to manipulate the DOM outside of your Vue instance, you shouldn’t do so with Vue methods (unless you create another Vue instance. Which we will, later). You could use DOM methods to manipulate other parts of the DOM, but avoid that if you can, as it can lead to unexpected behavior. It would also defeat the purpose of using a framework that enables you to write simple, declarative code.
Now’s a good time to model our data.
1.3 Modeling data
Using Vue, it’s best to think data-first. Change the data, and the view should update automatically. No need to call jQuery.append or any of the other DOM manipulation methods you might have used in the past; rather, you tell Vue what you want the interface to look like in a given state, and it should automatically update the interface accordingly.
So let’s model (some of) our data:
var Configurator = new Vue({
    el: '#modalWidget',

    data: {
        text: 'oh, hello',
        size: {
            height: 240,
            width: 320
        },
        colorScheme: {
            Flowers: {
                background: '',
                text: ''
            },
            Rivers: {
                background: '',
                text: ''
            },
            Sand: {
                background: '',
                text: ''
            },
            Snow: {
                background: '',
                text: ''
            },
            Storm: {
                background: '',
                text: ''
            },
            Custom: {
                background: '',
                text: ''
            }
        }
    }
});
Anything we put in the data object is available to the HTML element this Vue instance is mounted to.
To illustrate, let’s try an experiment. The text input at the top of the modal looks like this:
<input type="text" class="form-control" id="productText" placeholder="Text on your image">
Let’s drop the text property of our data object into a paragraph tag right below:
<input type="text" class="form-control" id="productText" placeholder="Text on your image">
<p>{{ text }}</p>
Check it out! (Source) Since we have a text property in our data object with a value of oh, hello, we can access it in the DOM with that double-bracket syntax ({{ text }}).2
1.3.1 Two-way data-binding
We now have access to our Vue instance’s data in our interface…but how do we use our interface to update our Vue instance’s data?
v-model to the rescue.
v-model is a special attribute (“directive”, in Vue parlance) that binds our interface to the data model in the Vue instance below it, and vice-versa. The data is bound in both directions, so if we update our data model, the interface updates; and if we update our interface, the data model updates. The interface is now reactive.
If we add v-model to our input and set it to the text property in our model:
<input type="text" class="form-control" id="productText" placeholder="Text on your image" v-model="text">
…the text in the p tag we created earlier should update automatically as we change the value of the input.
Now, anything you type in the text field is automatically reflected in the p tag below it, since it’s set to display whatever exists in the text property of our data object.
We can use the same directive to keep the size property up-to-date:
<div class="col-5">
    <label class="sr-only" for="productSizeX">Width</label>
    <input class="form-control" type="text" id="productSizeX" placeholder="Width" aria-describedby="dimensionsHelp" v-model="size.width">
</div>

<div class="col-2">×</div>

<div class="col-5">
    <label class="sr-only" for="productSizeY">Height</label>
    <input class="form-control" type="text" id="productSizeY" placeholder="Height" aria-describedby="dimensionsHelp" v-model="size.height">
</div>
Since data is just an object, we can access its properties using dot notation (size.width and size.height). You can see in the demo (source) that the data we set (320 and 240 for width and height, respectively) are now reflected in the interface.
In fact, if you install Vue Devtools, when you change the value in the text input, you’ll see the value in the Root instance of the Components tab update as you type, just like it did before inside the p tag. You can read about data-binding more in-depth (including caveats and limitations) in the Vue docs.
But what about that list of color scheme options?
1.3.2 Rendering lists of data and v-for
First things first: we’ll need our Vue instance to keep track of which option is currently selected, so we’ll add it to our data:
data: {
    // ... previous data
    selectedColorScheme: ''
}
Vue has a built-in directive for rendering lists: v-for. v-for loops through a list we pass to it, and renders interface elements based that list. v-for can loop over both objects (like what we have in data.colorScheme) and arrays3.
With that in mind, let’s add the directive to our our select:
<select v-model="selectedColorScheme" class="custom-select" id="productColorScheme">
    <option value="">Choose a color scheme</option>
    <option
        v-for="(scheme, schemeName) in colorScheme"
        v-bind:value="schemeName"
        v-bind:selected="schemeName === selectedColorScheme">
        {{schemeName}}
    </option>
</select>
Couple things to note here:
-
v-modelmakes another appearance here, on theselectelement. Just as before, this gives us two-way data-binding between our rendered view and our model. Once that value changes, our model will update, and if we programmatically change the model, our view will update. - We’re using those parentheses with
v-forso that we can get the key of our object, in addition to its value. If you just needed the value, you might dov-for="scheme in colorScheme". There are a few nice things like that built into v-for. More info in the docs. - There’s also a new directive:
v-bind.v-bindbinds our data to our interface, but unlikev-model, this is one-way data binding; if we make a change in our interface, the updated data won’t show up in our model. More info here in the docs. - Another bound attribute:
selected. If theschemeNamematches the current value ofselectedColorScheme, theselectedattribute is set totrue. This will come in handy later.
Bada bing! (source) Our list of color schemes is now reactive.

(You won’t be able to see the data update in the linked demo unless you’ve got Vue Devtools installed! A thousand points to you and your family if you can figure out how to use the Vue Devtools to update the value of selectedColorScheme by using your console, so you can watch that select element update.)
1.3.3 Conditional rendering with v-if
The last directive we need to worry about for now is v-if. As its name suggests, it inserts or removes elements based on some condition we give it.
v-show is similar, except that it uses CSS to show or hide the element it’s applied to. v-if actually adds and removes elements from the DOM. More info in the docs, again.
In this instance, we want to hide the color pickers if the Custom... color scheme is not selected. That looks like this:
<div v-if="selectedColorScheme === 'Custom...'" class="form-group">
    <label for="productCustomColorScheme">Custom color scheme</label>

    <div class="row">
        <div class="col-6">
            <input id="productCustomColorScheme" type="color" name="productBGColor" value="#868e96" class="form-control p-0">
            <label class="form-text text-muted mt-0" for="productCustomColorScheme"><small>Background</small></label>
        </div>

        <div class="col-6">
            <input id="productTextColor" type="color" name="productTextColor" value="#f8f9fa" class="form-control p-0">
            <label class="form-text text-muted mt-0" for="productTextColor"><small>Text</small></label>
        </div>
    </div>
</div>
Aaaaand boom goes the dynamite (source). Those pesky color-pickers disappear until we need them.
While we’re in there, we might as well toss in some colors for our color schemes, and make our custom color pickers reactive.
First we need to add some colors to our colorScheme object:
colorScheme: {
    Flowers: {
        background: '#76B041',
        text: '#FFC914'
    },
    Rivers: {
        background: '#698F3F',
        text: '#804E49'
    },
    Sand: {
        background: '#D58936',
        text: '#A44200'
    },
    Snow: {
        background: '#F8FFF4',
        text: '#474350'
    },
    Storm: {
        background: '#031926',
        text: '#7CA5B8'
    },
    'Custom...': {
        background: '#868e96',
        text: '#f8f9fa'
    }
}
(PS: Most of these color combos came from coolors.co. Great tool if you need quick color scheme ideas!)
Now, we just use v-model in our color pickers to bind them to the value of the "Custom..." property in our colorScheme object:
<!-- ... -->
<input
    class="form-control p-0"
    id="productCustomColorScheme"
    type="color"
    name="productBGColor"
    v-model="colorScheme[selectedColorScheme].background">
<!-- ... -->
<input
    id="productTextColor"
    type="color"
    name="productTextColor"
    v-model="colorScheme[selectedColorScheme].text"
    class="form-control p-0">
Now, our data model updates when the user selects custom colors. Open up the Vue dev tools and check it out (source), if you’d like.
The only tasks we need to tackle now are:
- Updating our product image as the user makes changes
- Data validation (for the product dimension inputs)
- Updating the price as we make changes
For both of these tasks, we’ll need…
1.4 Computed Properties
Computed properties are useful when we need to compute some data from our existing data. They update automatically as we make changes to the underlying data object, whether through our UI or programmatically in our JS.
To see why that’s useful, let’s make our product image update.
1.4.1 Updating our product image
In this example, we’re using placehold.it to generate our “product” images. Placehold.it lets us pass arguments to their API via the URL:
<!--
  Image URLs are structured like this:
  base/{imagesize}/{backgroundcolor}/{textcolor}?text=CustomText
-->
<img src="https://placehold.it/356x280/868e96/f8f9fa?text=Oh,hello" />
The resulting image looks like this:

You can see the size, background, and foreground colors in that URL, as well as a text query string, reflected in the resulting image.
We want the values in the URL to change based on user input, thus loading a new image every time the user changes an option. Computed properties help us do this by automagically recalculating every time our data changes. So if the user makes changes, we can instantly get back a new URL!
To get started, we need to add a new computed property to our Vue options:
data: {
// ...data we set earlier
},

computed: {
    productImageURL: function () {}
}
Every computed property is a method that returns a value. The this context of computed properties is bound to the current Vue instance. So we can access all information stored in data, as it updates, via this.
So let’s build our product image URL:
productImageURL: function () {
    var self = this;
    var url = buildURL();
    return url;

    function buildURL () {
        var base = 'https://placehold.it/';
        var size = self.size.width + 'x' + self.size.height + '/';
        var colors = colorsURLPart(self);
        var text = textURLPart(self);

        return base + size + colors + text;
    }

    function colorsURLPart () {
        var scheme = self.selectedColorScheme.length ? self.selectedColorScheme : 'Custom...';
        var bg = self.colorScheme[scheme].background.slice(1);
        var text = self.colorScheme[scheme].text.slice(1);

        return bg + '/' + text + '/';
    }

    function textURLPart() {
        var text = self.text.length ? '?text=' + encodeURIComponent(self.text) + '&' : '';

        return text;
    }
}
productImageURL is now a method that takes the size, color, and text data from our model, and spits out a string based on it.
You can bind this value to your HTML just like any other property:
<img alt="Product Image" v-bind:src="productImageURL" style="width: 100%; height: auto;">
There! Now our product image URL updates as the user changes values in the modal.
Hold on a second. The user can type new values pretty quickly; the color picker in particular can change its value many times per second. We probably don’t want to ping the API that often.
Let’s throttle those changes, then.
1.4.1.1 Updating our product image on a delay
We don’t want to update the product image as soon as the user changes things; we want to be kind to the user and their data caps, and only refresh the image when we’re sure they made a change.
So we only want to request a new image some time after they’ve made changes.
This is a perfect use case for the watch and methods properties of our Vue options object.
watch will contain a list of properties you’d like to…watch. Then, when a change is made, the corresponding method in watch is called. This is great for asynchronous or otherwise expensive operations to perform based on your data.
methods is a list of methods you create that are available to your entire Vue instance.
With that in mind, let’s create a new property in our data object to track our the image’s URL:
data: {
    // ...
    url: ''
}
…and we can bind it in our template:
<img alt="Product Image" :src="url" style="width: 100%; height: auto;">
Note: :src is shorthand for v-bind:src. No need to type out v-bind every time you want bound data!
Now let’s set up a watcher that does something when the value of our productImageURL property changes:
data: {
    // ...
},

computed: {
    // ...
},

watch: {
    // when our computed property `productImageURL` changes, fire
    // this function with the updated value
    productImageURL: function (newURL) {
        this.delayedUpdateURL(newURL);
    }
},
You can see there’s a new method in watch, the name of which corresponds to our productImageURL computed property. It accepts one argument: the latest value of the property we’re watching. I’ve set it to call a method called delayedUpdateURL, which we’ll build now.
data: {
    // ...
},

computed: {
    // ...
},

watch: {
    // ...
},

methods: {
    delayedUpdateURL: debounce(function (newURL) {
        this.url = newURL
    }, 1000)
},
Now we have a methods object in our instance options, which we can use to define a set of methods available to our Vue instance.
In this case, we’re defining our delayedUpdateURL method, which takes our new URL and gives it to a debounce function4 to delay its execution; the image only updates a second after the user stops changing things.
Last thing on the image: since we initialized it as an empty string above, the first thing the user will see is a blank space with alt text. Instead, let’s set up a default image URL.
data: {
    // ...
    url: 'https://placehold.it/320x240/868e96/f8f9fa?text=' + encodeURIComponent('Oh, hello')
}
Done! Take a peek (source). Now, the image updates dynamically as the user makes changes.
Now let’s use the same principles to validate our data.
1.5 Form validation
We can use the stuff we’ve learned so far to validate the form as the user types!
Since the validation we’re doing isn’t very complicated, we’ll manually code it here. If there was more going on, though, it might make sense to use a library like Vuelidate.
There are three things to check for our product dimensions:
- Is the given value a valid integer?
- Is the given value above 49?
- Is the given value below 601?
And one thing for our product text:
- Is the length of the string below 141 characters?
Let’s get going.
1.5.1 Data model
Validation makes our data a bit more complex. We need to keep track of the form’s validity as a whole (to disable submit), but also each individual input’s validity (to display feedback). So, keep this flow in mind:
- The form is assumed to be valid on first load
- If the user changes a value and it’s invalid, show an invalid input message and disable submit
We can use computed properties to keep track of all this.
data: {
    // First make sure we keep track of our validation conditions
    maxDimension: 600,
    minDimension: 50,
    maxTextLength: 140
},

computed: {
    productImageURL: function () {
        // ...
    },

    textLengthDifference: function () {
        return this.maxTextLength - this.text.length;
    },

    validForm: function () {
        return this.validHeight && this.validText && this.validWidth
    },

    validHeight: function () {
        return this.validateNumber(this.size.height)
    },

    validText: function () {
        return this.text.length <= 140
    },

    validWidth: function () {
        return this.validateNumber(this.size.width)
    }
},
We now have a few new properties in data that store our validation conditions, and a computed prop that calculates the difference between the max text length and the actual text length. This will come in handy when we write our view to notify the user if they’ve gone over our text limit.
There are also four additional computed props to check the validity of each of our inputs, and the form as a whole.
You can see in validWidth and validHeight methods, we’re calling a validateNumber method. Let’s write it now:
methods: {

    //...

    validateNumber: function (number) {
        return isInt(number) &&
               number >= 50 &&
               number <= 600
    }
}
Note: I found that isInt on StackOverflow. Pretty handy. It checks for a valid integer, and accounts for having been passed a string.
We’ll also need to update our productImageURL computed property to only request images with valid parameters:
productImageURL: function () {
    var self = this;
    var url = buildURL();
    return url;

    function buildURL () {
        var base = 'https://placehold.it/';
        var size = sizeURLPart();
        var colors = colorsURLPart();
        var text = textURLPart();

        return base + size + colors + text;
    }

    function colorsURLPart () {
        var scheme = self.selectedColorScheme.length ? self.selectedColorScheme : 'Custom...';
        var bg = self.colorScheme[scheme].background.slice(1);
        var text = self.colorScheme[scheme].text.slice(1);

        return bg + '/' + text + '/';
    }

    function sizeURLPart () {
        var width = valBetween(self.size.width, self.minDimension, self.maxDimension);
        var height = valBetween(self.size.height, self.minDimension, self.maxDimension);

        return width + 'x' + height + '/';
    }

    function textURLPart() {
        var text = self.text.length ? '?text=' + encodeURIComponent(self.text) + '&' : '';

        if (text.length > self.maxTextLength) {
            text = text.slice(0, self.maxTextLength - 1)
        }

        return text;
    }
},
Note: valBetween is a clever little one-liner I found on l’internets.
We’re off to a great start (source). In the demo, check the Vue dev tools to make sure the validation properties change as you expect them to. Check out the url property too!
1.5.2 Tying form validation to our Vue…er, view
Now that we know if our data is valid or not, based on our data model, we can use v-bind and v-if to swap out information in our view.
First, let’s disable the Add to Cart button by binding its disabled property to our validForm computed property:
<button type="button" class="btn btn-primary" :disabled="!validForm">Add to Cart</button>
Now, whenever validForm is false, the button is disabled.
Let’s add some information below the text input to notify the user of how many characters they have left, and, if they go over the limit, how many characters they’re over.
One cool thing Vue does: you can add or remove classes to your templates based on your data using an object literal syntax. You can do the same thing with any style attribute. Plenty of info in the docs, if you’d like to learn more!
Here’s what our input and the little text element look like with the class syntax in place:
<input
    type="text"
    class="form-control"
    :class="{ 'is-invalid': !validText }"
    id="productText"
    placeholder="Text on your image"
    v-model="text">
<small
    class="form-text text-right"
    :class="{
        'text-muted': validText,
        'invalid-feedback': !validText,
    }">
    {{ textLengthDifference }}
</small>
The bound :class attribute can live right alongside the default class attribute, and Vue merges them together intelligently based on state.
I’m using default Bootstrap 4 form classes here, but it could be any class system you have in place.
We can do a similar thing for our size inputs:
<div class="form-group">
    <label for="productSizeX">Size</label>

    <div class="row align-items-center">
        <div class="col-5">
            <label class="sr-only" for="productSizeX">Width</label>
            <input
                class="form-control"
                :class="{ 'is-invalid': !validWidth }"
                type="number"
                id="productSizeX"
                placeholder="Width"
                aria-describedby="dimensionsHelp"
                min="50"
                max="600"
                v-model="size.width">
        </div>

        <div class="col-2">×</div>

        <div class="col-5">
            <label class="sr-only" for="productSizeY">Height</label>
            <input
                class="form-control"
                :class="{ 'is-invalid': !validHeight }"
                type="number"
                id="productSizeY"
                placeholder="Height"
                aria-describedby="dimensionsHelp"
                min="50"
                max="600"
                v-model="size.height">
        </div>
    </div>

    <small
        class="form-text text-right d-block"
        :class="{
            'text-muted': validWidth && validHeight,
            'invalid-feedback': !validWidth || !validHeight
        }">
        Minimum: 50. Maximum: 600.
    </small>
</div>
There. Now form submission is disabled if any of our form element states are invalid, and each individual form element displays its own error status, if it’s available.
Go ‘head, check it out. (Source)
1.5.3 Setting the price
Last thing we’ll take care of is automatically updating the price of our product based on our attributes.
Let’s say our client wants to charge by the area (say, $0.005/pixel) and by the letter in the custom message ($0.10/letter).
A new computed property (and a couple methods) will do the math for us.
computed: {
    price: function () {
        var costPerLetter = 0.1;
        var costPerPixel = 0.005;
        var area = this.constrainDimension(this.size.width) * this.constrainDimension(this.size.height);
        var textLength = this.constrainTextLength(this.text);
        var price = (costPerLetter * textLength) + (costPerPixel * area);

        return '$' + price.toFixed(2);
    },
    // ...
},

// ...

methods: {
    constrainDimension: function (dimension) {
        return valBetween(dimension, this.minDimension, this.maxDimension)
    },

    constrainTextLength: function (text) {
        if (text.length > this.maxTextLength) {
            return this.maxTextLength
        }

        if (text.length == 0) {
            return 1
        }

        return text.length
    },
    // ...
}
…and we just need to drop it into our template:
<h4 class="mb-0 text-right text-success">{{ price }}</h4>
Now the price updates as we make changes! (Source) Neat.
That’s all for now
We’ve built out the basic functionality of our product configurator! If I were the client, I’d be happy about how responsive and quick it is. And since I’m a developer, I’m happy about how much Vue does for me.
Think about it: if you’d had to build all this without a framework, you would have had to:
- Manually set up event listeners on all your inputs
- Manually write event handlers for every event listener
- Figure out how to deal with state, especially state that affects various parts of the interface
- Manually write functions that add and remove elements from the DOM (or make changes to DOM attributes like
styleandclass) - Standardize your technique such that other members of your team could use it, and so it’s replicable across the site
If you enjoy doing things like that, or if it makes sense for your project, go for it. But I tend to think interface libraries like Vue are worth the cost, especially if you haven’t yet standardized your team around a certain way of working.
With Vue, we didn’t have to deal with any of that. Instead, we determined:
- What data did we need to track, and
- What we wanted the interface to look like if the data changed
Of course you need to know Vue syntax, but the API is relatively small, and the docs are good, so referring back to them is a pleasure. The overhead and technical debt is relatively small, especially if you have to continue building on this in the future (which we often do!).
It’s also important to note that, built like this, our DOM reflects our data, not the other way around. Building interfaces using imperative language in the way jQuery encourages us to code means we’re often storing our state directly in the DOM, which can sometimes come back to bite us.
Speaking of the DOM:
Look at the diff between the starting point and the end point of the modal!
Besides the fact that I moved a lot of attributes onto their own lines (a convention you’ll sometimes see in Vue templates, as lists of attributes and props grow), our template barely changed. Vue is pretty terrific as a drop-in tool. No need to rewrite your existing code.
For that matter, we squeezed a ton of functionality out of our interface, without any intermediary tools. No transpilation, no special templates, no nothing. All our jQuery functionality from Bootstrap is still there, humming along, untouched. You can’t beat that with a stick.
Alright. That covers it for now. But there were still a few other client specifications that we’re missing here. They wanted us to:
- Have the user’s shopping cart dynamically update when they hit “Add to cart”
- Make the configurator reusable so that we can drop it in elsewhere, and possibly change its functionality
For those, we’ll need to learn about Vue Components, props, and events.
Till next time.
-
You’ll see a lot more code in the Github repo than you will in the deployment (graciously hosted for free on Zeit’s Now service). That’s because I’m using Jigsaw, a Laravel-based static site generator, to build the demo site.
I’m using Docker to run and build the project in development. If you’re into that kind of thing, you can run the project with Docker Compose:
-
docker-compose -f init.docker-compose.yml upinstalls your dependencies and does a first build. Note: All NPM dependencies are installed in the container, so runninggulp watchon your local computer will fail unless you’re running Linux. -
docker-compose upruns thegulp watchcommand in the container so you can view the build at localhost:3000 -
docker-compose -f prod.docker-compose.yml upcreates abuild_productiondirectory and plops all your built assets in there.You can deploy the resulting static site to pretty much anywhere.
If you’d like to learn more about the setup, feel free to holler at me on the Twitters. I’m still a Docker neophyte, but I’m happy to share what I’ve learned so far! ↩
-
-
If you’re following along on Github, you’ll notice I’ve got an
@before my opening curly brackets{{. This is due to the fact that I’m using Jigsaw, which uses the Laravel Blade templating language, which actually uses the{{}}syntax already. Gotta escape it with@. You probably don’t have that problem. ↩ - If it’s important that your data show up in a particular order, it’s probably best to use an array, but I’m not worried about that here. More info here. ↩
-
You could use whatever technique you want to delay the execution of this function. Implementation doesn’t matter as much as the concept: we’re using this method to do asynchronous operations.
In this case, were delaying the API call for a full second after the user is done inputting data. (If you’re curious, I used the debounce from David Walsh Blog, which is apparently the one from Underscore. ↩